My sock journey continues.
After knitting quite a few (as in I have no idea now how many I've made) pairs on flatbed machines and having to seam them, then knitting a couple of pairs on a flatbed/ribber combo, and even having knitted Three. Whole. Pairs. by hand, I finally bought the perfect thing for making socks: a circular sock knitting machine.
My machine is the Speedster, from the Erlbacher Gearhart Knitting Machine Company in Cape Girardeau, Missouri. It arrived in mid-March, beautifully packed in its reusable box.
I had a bit of a rough start, because the part that trips the row counter was loose and got caught. Once that issue was corrected, it was a bit of a learning curve - but as of today, I've made eleven pairs of socks with it, including two pairs of tabbed footies that I absolutely love as they stay on all night in bed and work great in my walking shoes.
Showing posts with label Machine Knitting. Show all posts
Showing posts with label Machine Knitting. Show all posts
Monday, April 11, 2016
Thursday, September 22, 2011
Not Dead, After All
Last April, Frank Sanders from Northtipton was in Raleigh and helped me with my Brother KH-212. At the time, it seemed like it was functional, but when I got home and tried to cast on and knit, I discovered that several of the channels for the needles had gotten deformed, with the end result being that the machine would not knit.
Or so I thought.
Further research and an "oh well, there's nothing to lose" attitude led me to try changing the shape of the channels with a screwdriver. After testing to make sure all of the needles could freely move, and doing a fair bit of investigative "air knitting," today I finally got up the gumption to rethread the machine.
And guess what.
It's ain't dead, after all. Here are a couple of pictures of my very first swatch.


Wednesday, August 31, 2011
Eure....Whoops!
Everything doesn't always go according to plan. I had a clever idea for having ribbing on top of the kind of socks I made a couple of days ago: make the sock, take it off on waste yarn, then make a section of ribbing, take IT off on waste yarn, and then attach the two together using the main bed. Yes, there would still be a seam to make, but only on the ribbing part. Well...here's what that looks like:
Even with safety pins marking dropped stitches (I clearly need practice on picking stitches up that have been "saved" with waste yarn!), it looks pretty good. And it is very lovely, making the disappointment all that much sharper:
The cast-on for the ribbing doesn't stretch enough so that I can get my foot into the sock.
I'm not sure at all what to do about that. This is, in fact, the first time that I've made ribbing for anything on the ribber. There must be a fix...I guess I'm off to do some research!
 |
| It's "upside down" for no special reason... |
Even with safety pins marking dropped stitches (I clearly need practice on picking stitches up that have been "saved" with waste yarn!), it looks pretty good. And it is very lovely, making the disappointment all that much sharper:
The cast-on for the ribbing doesn't stretch enough so that I can get my foot into the sock.
I'm not sure at all what to do about that. This is, in fact, the first time that I've made ribbing for anything on the ribber. There must be a fix...I guess I'm off to do some research!
Tuesday, August 30, 2011
My Sock Story
Since I saw a pattern book for socks when I was a young girl (it was a rather complicated book on hand knitting argyle socks) I have wanted to learn to knit socks. A year or two ago, I successfully crocheted several pairs of socks, a pair for my stepdad, two for my mother, and two for me. Sadly, crocheted socks do not have as much "give" in them as knitted socks, and Mom's socks do not fit her - they are scheduled for demolition (I know it's called frogging, but demolition fits my mood about those socks) and then knitting. (If you want to see the crocheted socks, as well as a few other things that I've crocheted in the last couple of years, you can look at my Ravelry page. You might have to log in - I am not sure.)
In May of 2010, Danny and I stopped at a small yarn shop in Longview, WA, Evie's Yarn Emporium. I was looking for some stitch markers for the pair of socks which I was then crocheting, having dropped my last one under the seat in the rental car. Evie, who is a marvelously gregarious person, asked me if there was "anything else" besides the stitch markers - and I asked her about making socks. Nearly forty-five minutes later (during which time, Danny came in from the car because I had been gone so long that he had started to worry), I had a ball of yarn, a set of bamboo #1 double-pointed needles, a pattern, and a handful of handwritten notes and advice from Evie. That ball of yarn became my first handknitted pair of socks.
It was tough going, my first experience with double-pointed needles, but I wouldn't be stopped. I tried again, with #3 dpns and some sport weight yarn from KnitPicks. The second pair of socks came out better than the first, but I still felt that it took F O R E V E R. I wanted faster.
Fast forward to spring of this year, when I had my Bond. I made my first pair of machine knitted socks on it, from Liberty Wool purchased at DownTown Knits in Apex. Danny liked them so well that I promptly made two more pairs. (Only two pair, the first and last, are shown below - the blue pair that were made between these two appears in another post, but you get the general idea...)
And then...I got a Studio SK-301. My next two pairs of socks were made on it, from KnitPicks' Felici Sport. These socks feel great on the feet, so great that I almost didn't give Danny back the pair he loaned me when we were flying to Oregon this year. But...the problem with these, as with the ones made on the Bond, was twofold: the toes had to be Kitchenered, and the flat-knitted socks had to be seamed up the side. Yuck. Yes, you don't notice the seam when you are wearing the socks, but YUCK for having to make the seam.
So...now I have moved up to knitting socks in the round, as I mentioned in my last post. Next...figuring out how to put on a ribbed top!
Oh...if you do go to my Ravelry page, you'll see that there are a pair of socks listed as WIP (work in progress) that are called Insouciant Socks. There is no photo yet as I'm not sure what to do with them - they are "complete" but are too short and fit "funny." I might have to taken them apart and knit them on a machine - but I spent hours and hours and hours knitting the darned things. See? Another reason to machine knit socks - if you don't like the result, you probably have at most an hour or two in each sock so it doesn't hurt SO bad if you decide to frog 'em!
That's my story...so far. I have quite a few skeins of sock yarn in my workspace, and now that I don't have to seam, they will probably be socks in short order!
In May of 2010, Danny and I stopped at a small yarn shop in Longview, WA, Evie's Yarn Emporium. I was looking for some stitch markers for the pair of socks which I was then crocheting, having dropped my last one under the seat in the rental car. Evie, who is a marvelously gregarious person, asked me if there was "anything else" besides the stitch markers - and I asked her about making socks. Nearly forty-five minutes later (during which time, Danny came in from the car because I had been gone so long that he had started to worry), I had a ball of yarn, a set of bamboo #1 double-pointed needles, a pattern, and a handful of handwritten notes and advice from Evie. That ball of yarn became my first handknitted pair of socks.
It was tough going, my first experience with double-pointed needles, but I wouldn't be stopped. I tried again, with #3 dpns and some sport weight yarn from KnitPicks. The second pair of socks came out better than the first, but I still felt that it took F O R E V E R. I wanted faster.
 | |
| Blue socks - sport weight from KnitPicks. Brown - forgotten yarn name from Evie's. |
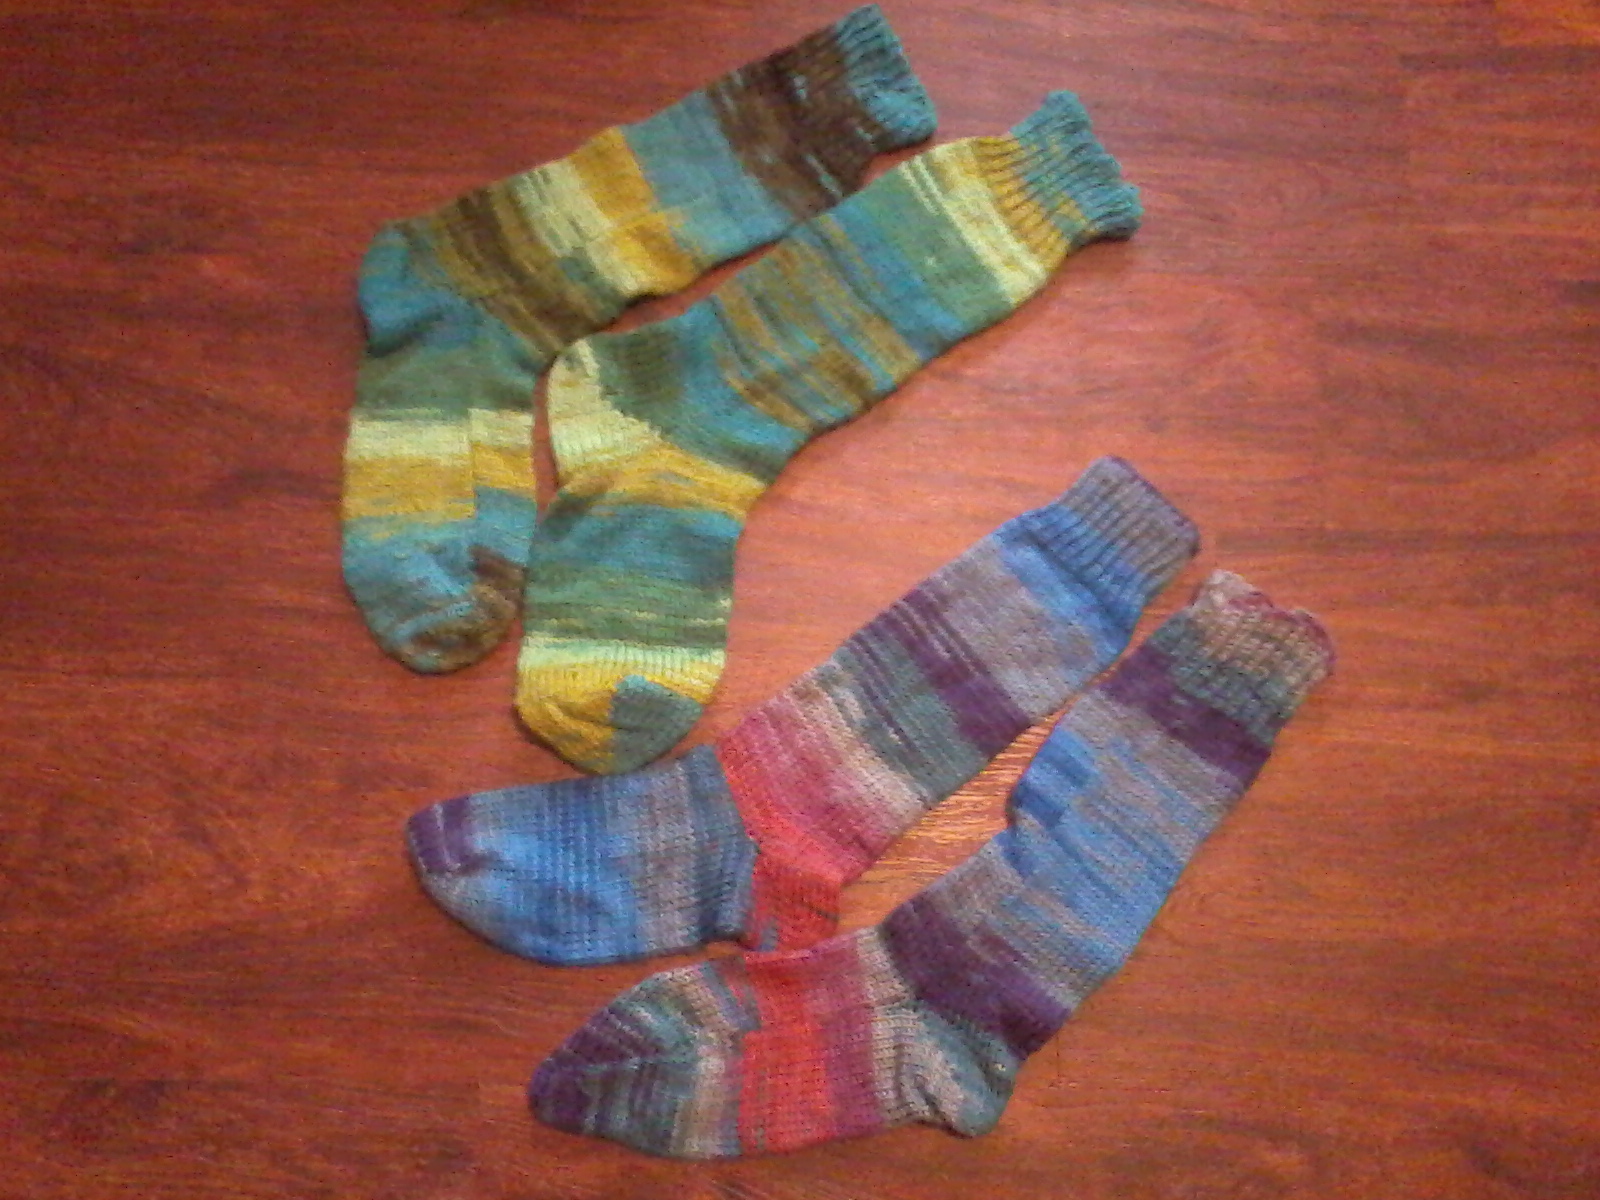 |
| Top: first pair of machine knitted socks; bottom, another pair. Liberty Wool, Bond machine. |
And then...I got a Studio SK-301. My next two pairs of socks were made on it, from KnitPicks' Felici Sport. These socks feel great on the feet, so great that I almost didn't give Danny back the pair he loaned me when we were flying to Oregon this year. But...the problem with these, as with the ones made on the Bond, was twofold: the toes had to be Kitchenered, and the flat-knitted socks had to be seamed up the side. Yuck. Yes, you don't notice the seam when you are wearing the socks, but YUCK for having to make the seam.
 |
| The Felici Sport socks, knitted on the Studio. |
Oh...if you do go to my Ravelry page, you'll see that there are a pair of socks listed as WIP (work in progress) that are called Insouciant Socks. There is no photo yet as I'm not sure what to do with them - they are "complete" but are too short and fit "funny." I might have to taken them apart and knit them on a machine - but I spent hours and hours and hours knitting the darned things. See? Another reason to machine knit socks - if you don't like the result, you probably have at most an hour or two in each sock so it doesn't hurt SO bad if you decide to frog 'em!
That's my story...so far. I have quite a few skeins of sock yarn in my workspace, and now that I don't have to seam, they will probably be socks in short order!
Monday, August 29, 2011
The "Ann Sock"
This weekend, I made my first pair of "Ann Socks," so named in honor of the very kind lady who told me HOW to make them. Ann attributed this sock to at least two other people, but she did admit to having changed what they had done, so, therefore, these are "Ann Socks" to me. If I get around to making substantive changes, I might start calling them "my" socks...
They are knitting toe-up, in the round using the ribber, with a short-rowed heel (the short-rowing is done on the main bed). The tops of the legs do not have ribbing on them, as you can't rib in the round (boo!), but instead roll down. I have an idea for how to attach ribbing while the socks are on the machine, but if it doesn't work, I'll probably take off any that need ribbing (such as those for Danny, who isn't a fan of the roll-down look) and do the ribbing by hand. (Ouch. I don't like to hand knit, I really don't, so I hope my idea for the machine-knit ribbing works!)
If/when I find the label from the yarn, I'll put a note here about what yarn this is, but I think it's a Bernat Sox or something similar.
Anyway...here is the first (note, I did say FIRST) pair! For me! The first pair of socks, by the way, that I have knitted for myself! The pink color doesn't really show up in this photo - but they are a lovely shade of pink with darker pink and some gray/green highlights. Love, love, love 'em!

Oh, and by the way - these socks represent the first project that I've made on the Knitmaster 700 that I bought myself for a graduation present! It only took me three months to get around to using it...and I have to give kudos where kudos are due, actually: another kind lady, Jo, from my knitting group was kind enough to spend a couple of hours at my house, giving me some tips on assembling the ribber correctly and walking me through my first sample of ribbed fabric. That sample was made of the yarn that is now one of the socks in the photo above.
So...to wrap up this post: THANK YOU, Ann and Jo!
Saturday, August 6, 2011
A Hodgepodge
School is over. I got all As in my classes this past term, putting me on the school's President's List for the term and making my overall GPA 3.7. My diploma is supposed to be mailed next week.
Since I didn't complete college immediately after high school, getting a diploma was something that I always hankered to do but never had time for until these past few years. Getting my "education" was quite an eye opener into the whole business of higher learning. It was fairly disappointing to find the focus less on education than on making money, from the latest edition textbooks being required despite being nearly identical to the previous version to the kinds of classes required. Yes, I'm glad I did it, but the comment of a director years ago to me when I mentioned wanting to get a degree has been resonating as she was right: "Why do you want to do that? It will make no difference to how well you do your job." Well, it won't, but hopefully it will make a positive difference to how my resume is received - meaning I hope it helps me get a job even though it won't help me do the job.
We have a treadmill, bought last year in a fit of optimism and mostly ignored since then. I started walking last week and have now walked for one hour every day since then. Two days ago, my total miles walked exceeded 26, and Danny pointed out that I had walked - with 23 hour breaks - a marathon. A marathon. I don't know that I would ever do an actual marathon...but I am being consistent with the exercise. We'll just have to see where it leads.
I made a pair of socks for my mom for her birthday. She chose the yarn, which is Red Heart Fiesta, and I made them up on my Brother KX-350. They seemed to come out fairly well, and today she said that she loves them. Hurrah!
Yesterday was an amazing experience. A knitter who lives about an hour from me wanted to get rid of her Singer 560 and various other bits - free if you could come get them. So I went. And she is the most amazing lady, a woman who used to be a knitting machine dealer. She showed me some of her work, which I seek to emulate, and kept giving me things! I got home and set up the tilt stand, cleaned the main bed, put a new needle pressed bar in it, and knitted a swatch. Then I got out the lace carriage and cleaned it, hooked up the electric, put in a card, and knitted my first piece of machine lace. Today, I am going to clean and set up the ribber and try it out. Then I need to go through the stack of books and magazines. She bought this equipment new in 1983, making it the newest metal bed machine that I have. I am still stunned by her kindness and generosity.
The garden is nearly done for the year. The peppers have been doing fantastic - and here are some pictures of some of that bounty.


That's all from me for today! Cheers!
Since I didn't complete college immediately after high school, getting a diploma was something that I always hankered to do but never had time for until these past few years. Getting my "education" was quite an eye opener into the whole business of higher learning. It was fairly disappointing to find the focus less on education than on making money, from the latest edition textbooks being required despite being nearly identical to the previous version to the kinds of classes required. Yes, I'm glad I did it, but the comment of a director years ago to me when I mentioned wanting to get a degree has been resonating as she was right: "Why do you want to do that? It will make no difference to how well you do your job." Well, it won't, but hopefully it will make a positive difference to how my resume is received - meaning I hope it helps me get a job even though it won't help me do the job.
We have a treadmill, bought last year in a fit of optimism and mostly ignored since then. I started walking last week and have now walked for one hour every day since then. Two days ago, my total miles walked exceeded 26, and Danny pointed out that I had walked - with 23 hour breaks - a marathon. A marathon. I don't know that I would ever do an actual marathon...but I am being consistent with the exercise. We'll just have to see where it leads.
I made a pair of socks for my mom for her birthday. She chose the yarn, which is Red Heart Fiesta, and I made them up on my Brother KX-350. They seemed to come out fairly well, and today she said that she loves them. Hurrah!
 |
| Mom's Socks |
 |
| Machine Lace! |
The garden is nearly done for the year. The peppers have been doing fantastic - and here are some pictures of some of that bounty.


That's all from me for today! Cheers!
Sunday, July 10, 2011
Another Knitted Item
This afghan and matching pillow were made on the USM from Caron One Pound (the pink and cream) and Red Heart regular worsted (the multicolor). The pattern is in the "learning book" that comes with a new USM. They were completed...oh...probably in April.


Saturday, July 9, 2011
Yes! A Bit of Knitting!
I actually have knitted a couple of things recently. Yes, they are "just" baby blankets, but both are a new technique to me so I actually learned a thing or two!
Both blankets were made on the Brother KX-350 from Diana Sullivan's Swirl Baby Blanket video pattern.
This one was made with Vanna's Choice acrylic yarn in rust and white with the tension dial set at 7. It used EXACTLY six skeins of the yarn - three of each color - and I had to "squinch" a bit to get the rust edging done. There was just the tiniest bit left over of the white.
 Why rust and white? Those are the colors for University of Texas, and the parents-to-be for whom this blanket was made both attended that school. That's why the not-strictly-baby-color scheme.
I can make "baby-colored" stuff, too, though. So here is the second of the two blankets, made from Bernat Baby Coordinates on tension 3. The yarn was in my stash and I forgot to weigh the finished product, so I have no idea how much yarn was used. :-( Boo for forgetting important details!
 I ran out of time to get this one finished before we left for our trip to Ohio and Indiana, so the ends were weaved in while riding in the car, and the light steaming was done in the hotel room in Zanesville, OH. First time in years that I'd needed the hotel iron, and I was glad that it was there. Actually - it was a nice iron, with a retractable cord. If/when my iron ever gives up (probably never, since I rarely use it), I want one with a retractable cord.
Before I sold my USM, I made a couple of other baby blankets that were not intended for anyone. Since they are riddled with errors, it didn't seem likely that anyone would want them. But, not so! The friend who got both of the above blankets was thrilled (at least, she did a great job of ACTING thrilled) when I asked her if she would like to have them. The larger of the two, with the blocks of color, was made from Caron's Simply Soft. The brand of the other yarn has gone the way of many other things: right out of my brain. And I don't remember how much yarn or what keyplate. What I do know is that the edgings on these were hand crocheted and took far longer than the actual knitting. I did learn about keeping the yarn un-tensioned on the USM, and also learned about sewing as you go - a technique which came out better in the round blankets above.
This one is the smaller of the two, and the pattern is from the Bond Gifts and Toys Pattern Book.

This is the larger of the two. It's made from the pattern in the "teaching booklet" that comes with a new Bond machine. I left off the fringe as it didn't seem safe for babies - way too easy for that cutesy fringe to get stuck in a little throat.

Missing from my blog, I realize now, are pictures of all the socks I've made this year. After I get the laundry done, I'll see if that mistake can be rectified. At least Danny loves his socks and wears them!
Both blankets were made on the Brother KX-350 from Diana Sullivan's Swirl Baby Blanket video pattern.
This one was made with Vanna's Choice acrylic yarn in rust and white with the tension dial set at 7. It used EXACTLY six skeins of the yarn - three of each color - and I had to "squinch" a bit to get the rust edging done. There was just the tiniest bit left over of the white.

I can make "baby-colored" stuff, too, though. So here is the second of the two blankets, made from Bernat Baby Coordinates on tension 3. The yarn was in my stash and I forgot to weigh the finished product, so I have no idea how much yarn was used. :-( Boo for forgetting important details!

Before I sold my USM, I made a couple of other baby blankets that were not intended for anyone. Since they are riddled with errors, it didn't seem likely that anyone would want them. But, not so! The friend who got both of the above blankets was thrilled (at least, she did a great job of ACTING thrilled) when I asked her if she would like to have them. The larger of the two, with the blocks of color, was made from Caron's Simply Soft. The brand of the other yarn has gone the way of many other things: right out of my brain. And I don't remember how much yarn or what keyplate. What I do know is that the edgings on these were hand crocheted and took far longer than the actual knitting. I did learn about keeping the yarn un-tensioned on the USM, and also learned about sewing as you go - a technique which came out better in the round blankets above.
This one is the smaller of the two, and the pattern is from the Bond Gifts and Toys Pattern Book.

This is the larger of the two. It's made from the pattern in the "teaching booklet" that comes with a new Bond machine. I left off the fringe as it didn't seem safe for babies - way too easy for that cutesy fringe to get stuck in a little throat.

Missing from my blog, I realize now, are pictures of all the socks I've made this year. After I get the laundry done, I'll see if that mistake can be rectified. At least Danny loves his socks and wears them!
Monday, May 2, 2011
Next Sweater and Another Pair of Socks
What a productive day! I finished the second sweater and another pair of Liberty Wool socks. I changed up the neckline a little on the sweater by adding a row of shell, left of the shaping on the shoulders, and added a row of single crochet at the end of the sleeves.

 |
| Blue Liberty Wool Socks |

 |
| Both sweaters |
 |
| The newest sweater |
Friday, April 29, 2011
Machine Knitting: Seminar and a Sweater
Today was the first day of the two-day seminar put on by the Carolina Machine Knitters Guild. I had a great afternoon because I got to spend it with Frank Sanders from Northtipton (http://northtipton.com/) who taught me how to clean knitting machines and ALSO showed me that my 1958 Brother KH212 (the BrotherKnit) machine is functional! YAY! (Update May 2: I asked for and received permission to use the picture below, which is Frank Sanders and my KH212. Thanks again for EVERYTHING, Cathie and Frank!)


Unfortunately, the cotton sweater that I made on my Bond and had planned to wear it to the seminar is really comfy and therefore spent the weekend in the dirty clothes bin instead of being worn to the seminar. The good news is I'm almost done with the next one!
Sunday, April 24, 2011
My First USM Sweater
The knitting machine seminar is this coming Friday and Saturday. I really wanted to be able to wear SOMETHING I made on the machine to it, and fortunately this easy pattern was in the old manual. It's made from Peaches & Creme yarn, most of two cones (I used one cone for the front and another for the back; the leftovers probably will become kitchen towels, placemats, or potholders).
I'm very pleased with the result and am going to run over to A.C. Moore for some more cotton yarn. I'd like to try a solid next, and do a cable up the front.


I'm very pleased with the result and am going to run over to A.C. Moore for some more cotton yarn. I'd like to try a solid next, and do a cable up the front.


Wednesday, March 16, 2011
My First USM Slippers
Based on my memory of a hand-knit pattern used in childhood....these are stockinette around the foot and then ribbed around the toes.
KP 4, Caron One Pound
3.5 stitches to the inch; 5 rows to the inch
For a 9 inch x 10-1/2 inch rectangle:
Cast on 32. Knit for 52 rows. Convert the 11th stitch from each side to purl (to make the bend for the sides). Convert the area between the 11th stitches to 1x1 ribbing for the last 25 rows.
Run a needle through the stitches on the machine to cast off; pull tight to gather. Sew the top edge as far as the ribbing goes. Sew up back seam.
Repeat for second slipper.
Notes for New USM Users
Just a few things I learned along the way....
#1 - make sure your table is absolutely level. THE MACHINE WON'T WORK IF IT ISN'T. Especially check for bowing under the middle of the machine - my first table bowed downward, just slightly, but it was there and caused many jams
#2 - the foam that holds the needles in might hold them too tight, so be prepared to remove it and experiment with another solution, such as laying various numbers of strands of Caron Simply Soft over the needles
#3 - there can be absolutely no tension whatsoever on the yarn going into the carriage
#4 - Check each needle for manufacturing burrs. Sand them off or they will catch your yarn. (I used a heavy-duty emery board.)
#5 - Check each needle's plastic slot for same.
#6 - The weighted hem that comes with the machine is really only good for at least 3/4 carriage-wide projects. It's too heavy for smaller projects; therefore, if you want to do something smaller you will need to either buy a smaller weighted hem or make your own. Or take out the weights - use about 1 weight for every 25 stitches cast on.
#7 - check under the green parts of the carriage for rough spots that can catch on yarn. Sand them off with an emery board.
Subscribe to:
Comments (Atom)